Tuesday, November 25, 2008

Ice Block Toys

For a fun twist to bath time, try Ice Block Toys. First, find some toys around your house that are water safe. Fill up some containers with water, and freeze the toys in them. Once they're frozen, dip them in warm water to release the ice blocks. Toss them in the tub, and let your kids have fun watching their toys appear! If you don't want to do bath time, let your kids play with them in a sink full of warm water.

Wednesday, November 19, 2008

Chunky Crayons

If you're like me, then you most likely have tons of broken crayon pieces in your crayon box. Rather than throw them away, I like to recycle them and use them again! This is one of my favorite things. It's great for learning colors, sorting, and teaching about recycling.


First of all, take all the paper off your crayon pieces. Then sort them however you want. This was my daughter's favorite part. You can sort like colors, by season, or just any combination of rainbow.
Put them in a sprayed muffin tin- you can use the big or mini one.

Put muffin tin in a 275 degree oven for about ten minutes (just keep an eye on them- they melt pretty fast). When they're all melted, take out and let cool. When it's cool enough to handle, you can put it in the freezer to speed up the process, and that also makes them come right out of the pan.

Take them out, and you have brand new chunky crayons! These are perfect for my one year old son, who gets frustrated with regular crayons.

If you have candy molds or other fun baking tins, you can use those as well. Just make sure your child knows they're not a treat! :)

Monday, October 20, 2008

Muffin Tin Meals


As a mother of a very picky, fidgety eater, I am all for ideas that will get her to eat! I've seen this around a lot, and thought I'd give it a try. I love it because it's so versatile- you can use a six muffin tin, or twelve, mini muffin tins, as well as switch up what you put in them. My daughter was actually excited about helping mom get lunch ready! The little mini spoon just made it more fun to eat.
For an older baby, you could do different finger foods.

Wednesday, July 30, 2008

"Scrap" Book

I save my scrap paper for my daughter to color on, but I found a way that's much more fun! We took several pieces of scrap paper, folded them in half and stapled down the edge to make a "book". Then I gave her some crayons and stickers and she made her very own book. She felt pretty important, if you can tell from the pictures below. Anyway, this is just a random daily activity that we spiced up a little.

Saturday, June 28, 2008

Water Fight


Okay, so not very original, but sometimes the most spontaneous things are the very most fun! My husband and I were outside the other day when it was pretty hot, and we somehow got into a water fight, fully dressed of course! We involved my kids (being gentle with them) and they had a BLAST and didn't want to go inside. Yes, I had to deal with wet soggy clothes afterwards, but pure joy like that is worth it.

Thursday, May 22, 2008

Bubbles and Bubble Wands

Sorry I've been missing in action! I've had a crazy couple of weeks.
I LOVE bubbles (and my kids do too.) I made this homemade solution because we go through so much of this stuff, and this is cheaper for us, plus it works great. I have a few more recipes I want to try, but for now here's this one.

Bubble Recipe:

(Fills a gallon milk jug)
11 Cups Water
4 Cups Ajax dish soap (anti-bacterial works best)
1 Cup corn syrup

Mix all together!

We've been having a great time experimenting with different bubble wands.

Bubble Wand Ideas:

First of all, pipe cleaners are awesome. Kids can make whatever shape/color they want.

Another thing I love to do- take a couple straws and cut them in half, then tape them together. Dip one end in bubble solution, and blow into the other end. This makes tons of little bubbles, and it's easy for young children to do.
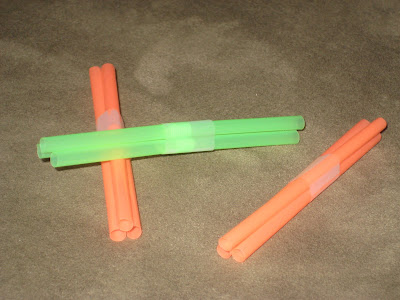
Fly Swatters are GREAT. (You can buy a new clean one for really cheap.) Just dip and wave it around. Makes LOTS of bubbles. Funnels. We dipped the small end in the solution, then blew into the big end. Easy for my daughter.

The possibilities are endless!

Thursday, May 8, 2008

Highchair Entertainment

I was getting really frustrated tonight trying to get a bunch of cleaning done while trying to keep my one year old out of it. He wasn't hungry, so snacks were out, and he was just restless- he got four shots this afternoon! :( Anyway, I decided to try this. I've had it in mind for awhile. All you do is take some little toys, tie them to pieces of string, and tape them to the high chair. This is GREAT because he loved playing with all the little toys, throwing them off, and then he could get them again. Bonus for my son in particular- he loves playing with his feet, so that was fun for him too. :)

Monday, April 28, 2008

Tape City

We had a lot of fun with tape this morning. We made roads for my daughter's cars! We even made a little parking lot. You could get really creative with this by accessorizing with toys (doll houses, little people, trees, animals...)


Idea from The Toddler's Busy Book by Trish Kuffner

Thursday, April 24, 2008

Basketsock


This may be a given, but I thought I'd post it anyway. We played our own version of basketball, but with socks and a basket. Both kids found it to be great fun (and mom and dad as well!) and really, how much damage can you do with socks?

Wednesday, April 23, 2008

Sticky Feet

Today, I took some clear contact paper and taped it to the floor, sticky side up. My kids had SO much fun walking on it, dancing on it, just playing in general. Their feet (and hands) not only stick to it, but make fun sounds coming up!

We got it out again later, (this time I put it on the kitchen floor, and it stuck better) and the kids had even more fun. They got pretty creative rolling toys across it and stuff. They're still in there playing- I'm going to have a hard time getting them to go to bed! :)


Idea from The Toddler's Busy Book by Trish Kuffner

Monday, April 21, 2008

Painted Bread

We had fun this morning with some bread. Just take a little milk in some small containers, add a few drops of food coloring to each, get some clean paint brushes, and design away! We then toasted ours, or you can use them to make sandwiches.

Friday, April 18, 2008

Flying Fish


This is a super easy activity that even I enjoyed. When you throw the fish into the air (or drop them from a higher point), they kind of flutter and spin down. Then we took them outside where it was slightly windy... boy did those things fly! It was hilarious! My daughter stood on top of her slide and would let go, and they'd take off and we chased them all over the yard. Good times. Here's what ya do:

Cut 1 inch strips from the page of an old magazine (long ways). Cut a slit halfway into the strip at each end about 1 inch from the end. (At one end of the strip cut from the top halfway down to the middle, and at the other end cut from the bottom halfway up to the middle.) Bend the strip into a loop and push the slits together so that the loop closes and it looks like a fish.
This idea came from "The Toddler's Busy Book" by Trish Kuffner

Wednesday, April 16, 2008

Cereal Box Flip Flops

Many thanks to Valerie for this idea! I've gotten a little behind with all the sickness in my house, so here's an idea she did with her son. I think it's so cute. Take any cereal box and lay it out flat. Trace your kids shoes on it and then cut them out. (Valerie had her son cut them out so he could practice cutting) Then cut out strips to use as the straps. Just tape them on the back and there you have it. Homemade flip flops.

Tuesday, April 8, 2008

JELL-O Jigglers


Remeber these gems? I used to love it when my mom made these for me! I was trying to think of something my daughter could eat while being sick, and these came to mind. She loved them.
Here's the recipe, which you can also find on any JELL-O box:
4 small boxes or 2 large boxes of Jello gelatin
2 1/2 cups boiling water (do not add cold water).
Stir boiling water into gelatin. Dissolve completely. Pour mixture slowly into 13 x 9 inch pan. Chill at least 3 hours, Jigglers will be firm after 1 hour, but may be difficult to remove from pan.
To cut Jigglers dip bottom of pan in warm water for 15 seconds to loosen gelatin. Cut shapes with cookie cutters. All the way through the gelatin. Lift from the pan with index finger or metal spatula. A tip for even easier removable, lightly coat pan with Pam cooking spray before pouring in gelatin mixture.
(I didn't need very many, so I used one big box and cut the water in half and put it in a 9x9 pan).

Monday, April 7, 2008

Magnets on a Cookie Sheet

My daughter has been miserably sick for three days, and I was desperate for anything to help her pass the time. When she's sick, I don't mind her watching tv, but for three days straight? No. So I found a cookie sheet, and gathered all the magnets from my fridge, so she could sit in bed and play with it on her lap. She loved it!

Wednesday, April 2, 2008

Tissues?

One of my piano student's mothers told me that when her daughter was a baby, she gave her a box of tissues for her birthday. I thought that was a funny thing, until my son came along. Guess what was in his stocking at Christmas? A box of tissues! He sat there and pulled them out, one by one, happier than anything. His big sister wanted one too. :)

Tuesday, April 1, 2008

Spin the Bottle

I've said before that the simplest things are often the best. My daughter LOVED this. We read a lot at our house anyway, but this put a fun spin on it (no pun intended. Seriously.) and made it into a game. We just took a bunch of board books and stood them up in a circle, took a bottle (from baby brother since we have a lot of those around) and spun! Whatever book it points to, you sit down and read! After we had gone though all of these books two or three times, she brought out a new set of books and we started all over.

Friday, March 28, 2008

Ball Ramp

We buy lots of diapers around here, and we buy them by the box, but this can be made from any box. Just tape everything shut, cut a hole in one end, and cut along the sides and one end so you can push it back, as shown. Tape the "ramp" in place, and let your kids play! Mine loved to drop the balls down the hole and see how far they'd go...
And then they found out that by placing it horizontally, it's a whole new game! Run the ball down the ramp, and watch it go out the hole!

This was especially fun on our kitchen floor, and as soon as the wind dies down outside, we'll try it out on our sidewalk.

Wednesday, March 26, 2008

Delicious Modeling Clay

This has got to be one of my favorites. I remember my mom making this a lot for me when I was a kid. The recipe comes from my Aunt Nadine. It's simple to make, fun to play with, and so yummy! I kept snitching when my daughter was playing this morning. This is stuff we have in our food storage, so it's either free (in theory!) or really cheap. (Thanks for reminding me of this, Meg!) Here's the recipe:

Delicious Modeling Clay
1/4 cup peanut butter
1/4 cup honey
1/2 cup instant powdered milk
Mix together. More milk may be added as needed.


Monday, March 24, 2008

Pipe Cleaners

I LOVE these things! They're cheap (I got this pack for a dollar) and the fun is endless. These are great for church; I make sure I have some in my bag every week. They are quiet and they really entertain my kids. Good for learning colors, too.


Pipe cleaners are perfect for making cereal bracelets. They are stiff enough that it's easy for toddlers to put the cereal on themselves, and they don't slide off when they're putting more on. My daugter loved this! (Thanks Kelly!)


My daughter got this flower in nursery, and I thought it was a great idea. You take a paper cup and poke a hole in the bottom. Attach a paper or plastic flower (you could easily cut some out of colored paper) to one end of a green pipe cleaner and put the other end through the cup. My daugter made her flower "grow" by pushing the pipe cleaner up over and over and over!

There are SO many things you can do. Tomorrow we are going to make a tiara!

Here it is! As she calls it, her "Princess Crown".

Friday, March 21, 2008

Plastic Easter Eggs

Since you can find plastic Easter eggs in abundance this time of year, I decided to find some fun things to do with them other than just fill them with candy. I took a shoe box, and cut some holes in it. (If you open an egg and trace it, then the egg will fit perfectly). Then you put the eggs in, take a toy hammer (or fist or whatever!) and whack away! Then let your kids do it! :) My daughter loved this. I also used it as a learning tool since she is learning colors. "Whack a purple egg!" I also let her decorate it with stickers. My one year old absolutely delighted in this. He loved pushing the eggs through, then lifting the box to see where they went. He also liked setting them in the holes.


There are lots of other fun things you can do with plastic eggs. Put little toys inside and see if your child can guess what they are. Put them in a sink full of water (we love water at our house!) Have "spoon races" and fill a basket on the other side of the room (younger children can use something bigger like a ladle). Seriously, these things can be great fun!

Thursday, March 20, 2008

Blankie-Pillow Party!

It's amazing how the simplest things can often be the most fun. My kids LOVE this one. Grab all your pillows and blankets and throw them into the middle of the floor. Let your kids dive in!

Pudding Finger Paint

We did this earlier today, and my daughter loved it!! Make some pudding that is fairly light colored. We used Banana Cream, because that's what I had in my cupboard. My daugher helped me mix it up, then we added food coloring, and viola! Edible finger paint! Lay out some waxed paper (I used baking liner) or a cookie sheet or even a place mat, and you have a great canvas. Then, let them have at it! For some added fun, throw in a basting brush! (Be sure to have your child wear a bib or apron!) This is also a great way for toddlers to learn about colors.

Followers